More interested in trying out the game instead of reading about it? That’s possible! Please follow the link:
https://lazarus97.itch.io/supers-unleashed
Context
In the second year of my journey to becoming a game developer, we were introduced to a final teamproject. This project, called ‘Project Game Development (PGD)’ was the real deal for students. The teams were assigned to work in Unity, at the time completely new for students, and were making a game like professionals: Working with scrum, project briefs, publishers, demos, dev logs, prototypes and even making our own page on itch.io was part of the package. This meant serious business, and was a meant to teach students how making a game as a small team would go in the real world.
In this post, I will be diving deeper into this project and what we as a team accomplished. I will be sharing our design and development processes with the struggles and obstacles we encountered, followed by my own personal contributions regarding the final product. Enjoy my personal favorite project!
Design 1
Projects like this meant coming up with our own designs and ideas. It was all ours to create whatever we wanted, only requirement was working in Unity3D. This was our third big team project as students, and even though we had a new team, the design process went pretty smoothly. We spent the first sprint (about 3 weeks) coming up with ideas and trying to come up with an idea that would be playable. In the end, we had to present our prototype and ideas and overall design to our publisher, who would give us a go or no-go depending on what we had.
We got a ‘go’ so this meant we could go with our initial idea. Our idea was simple: a SCI-FI RPG where you, the player, escaped a laboratorium where scientists were experimenting with you. You now possess super-human abilities and are looking for ways to get revenge on the lab.
The idea seemed doable on a small scale, we had around three levels in mind and one big base where you’d return to after needing to rest. In a level, different creatures would fight you. After defeating them, you’d get experience points. You could spend these points in the shop located in the base, possible upgrades were other abilities, health and potion like items. If you were strong enough, you could make your way through the levels and eventually find yourself in the lab. Here, you had to defeat a few super enemies to eventually get your revenge and win the game.
Development 1
At first, our ideas and design seemed doable. We were a team of 6, so with a good division of tasks we would be able to get to our end goal. However, we did not account for a number of factors. Since we were all new to Unity, small task could take much longer due to inexperience with the engine. Furthermore, we were all students who had to complete subjects from the previous year on top of the current year, so we could not spend all our time on this project, sometimes even no time at all. Additionally, we had a lot of small things to do to accomplish our goals, and many of our goals were not clearly defined and still up for debate. This made it hard to get started with something, not knowing if it will be used in the end. And lastly, maybe even the biggest, because we had so many ideas and small tasks, we could all be working on something that would not contribute to the current status of the project. This lead to issues regarding priorities, which in turn would lead to a very unfinished product.
We quickly encountered many of these factors. We were not able to spend as much time as we wanted to on the project, and when we did we were mostly talking about design topics. When working on a feature, many of us encountered obstacles which would block our progress, or we were working on something while we did not even have a map to walk on. This all lead to a rocky start of the development process, and when showing our first and second prototype at the end of the first and second sprints, the publishers were not happy at all with what we had for them. They decided to step in, significantly cutting down our scope and making sure we would at least deliver a finished game.
Design 2
With the help and guidance of the publishers, we were able to cut down our scope a good amount. We now had a clear vision of what the publishers wanted to see, a clear path towards it and a clear set of tasks to be made. The finished product had to be something like: An arena fighter game where the player starts in a safe area. In this area, he can upgrade three stats: Damage, health or dexterity. The player then goes to an arena, the door closes behind him and opens when all enemies are defeated. This continues for ~20 rounds, each round becoming more difficult because of xyz (more enemies, different enemies, speeds, abilities etc.).
Cool! We have a new idea and goal, which sparked our motivation tremendously. Because this was the bare minimum, we decided to add our own elements to it, we did not want to deliver just the minimum product. We decided the following: We have a big arena, with a elevator that leads to it. Inside the arena, we have the main enemy spawn. These are melee enemies that attack the player, each turn the amount of these enemies increases. Every x turns, another enemy spawns who stays at a distance and shoots projectiles around him. In later turns, drones spawn that follow the player and shoot at them with a cooldown period. Outside of the arena, we have a big area with NPC’s for added atmosphere. On a platform, the player can interact with the system and upgrade one of three skill trees. Upgrading the damage skill will increase it’s damage, when reaching above 3 points for this tree, the player shoots not 1 but 3 projectiles at a time. Upgrading the health skill tree will increase the player’s health, and make a med kit spawn after each round. Upgrading the dexterity skill tree will increase the player’s speed. Apart from these features, we were determined to add enough polishing to the game to make it look and feel good. We added sound effects, music, particle effects, camera shake, post-processing, lights and other elements to make the game feel smooth and good when playing.
Development 2
With a clear goal in mind, we were headed into the final sprint for this project. We divided tasks using our Trello workspace, communicated daily with what we were doing and broke down tasks to smaller tasks to increase our progression rates. We assisted each other and always were having fun working on our game. In the end, we managed to implement what we set out for our final product and are quite proud of our final achievements when looking back to what we had previously.
I myself worked on various tasks during the development of the game. Starting with the basic enemy. I wanted to work on this task because I had never worked on enemies in previous team projects, so I wanted to increase my experience with this. I also worked on a (unused) NPC system, different camera’s, camera shakes, a few sound effects and worked on all animations for the player and basic enemies. In the following section, I will showcase what I made and how I made it.
Personal contributions
In this section I will cover noteworthy contributions I made to the project, providing insights into my thoughts and sharing code snippets. I’ll be sharing my implementation of multiple animation controllers, different cameras, and implementation of the main enemy.
AnimationControllers
One of the things I’m most proud of regarding this project, is the animations of both the player and the enemies. I had never worked with Unity3D before, so diving into the animations was quite difficult and proved to be a hard challenge with the models, different animations, and all the transitions, not even mentioning the timing of animations in respect to their actions.
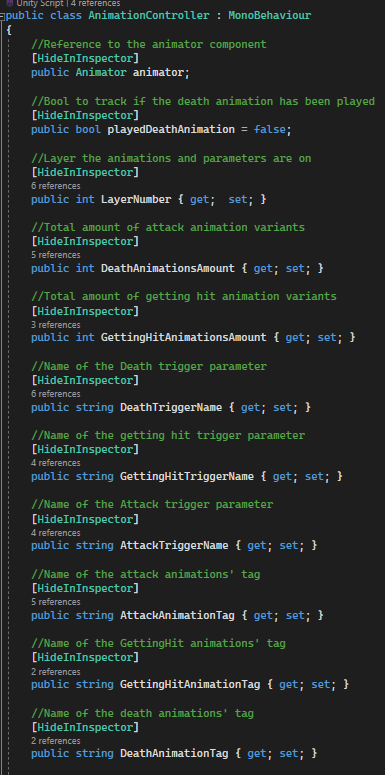
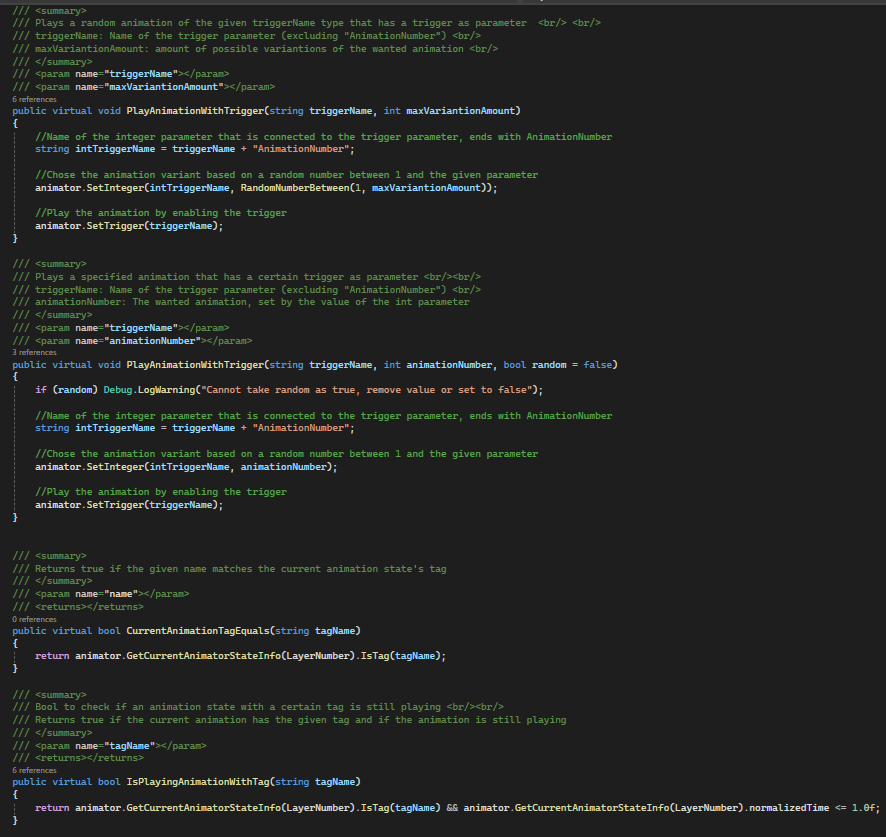
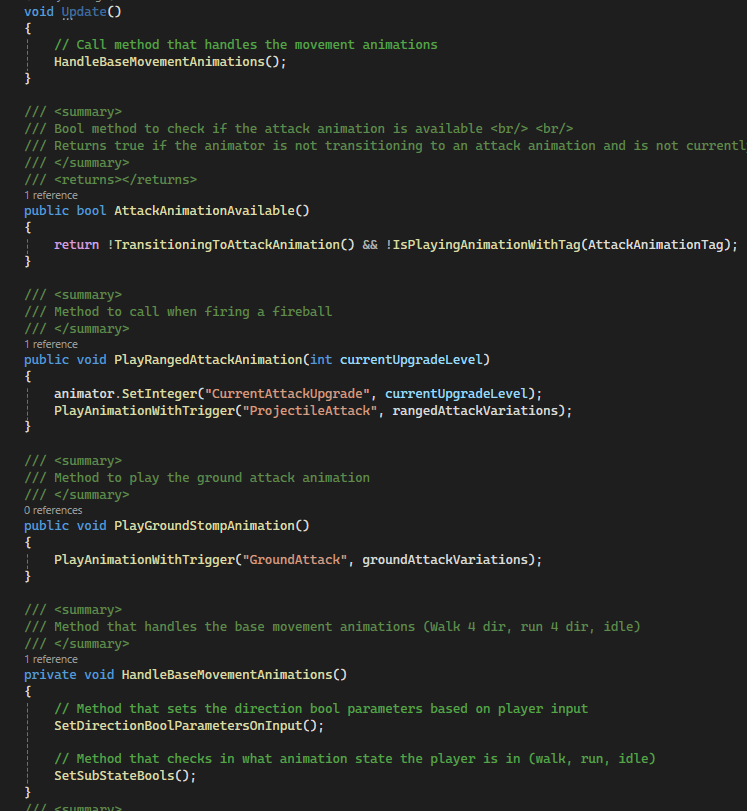
I decided to make a class that will handle the animations for the player. This class consists of methods to play an animation, wait for an animation, check if an animation is being played, play a kind of animation (different getting hit animations for example) and more. I first made this class for the player, however, when working on the enemy, I realized he could benefit from a similar class. Therefore, I remade the class to be a parent class, then made individual classes for the player and enemy that derive from the player. This approach, using an animation controller, worked very good with the project and made playing animations easy. This was especially easy for my teammates, who gave me the task to handle animations. I didn’t want them to rely on my time to implement an animation, so tried my best to take an approach that would be easy to use for my teammates, which it was. Below you can find a few snippets of how I structured the animator, as well as a few code snippets of the parent and child classes.
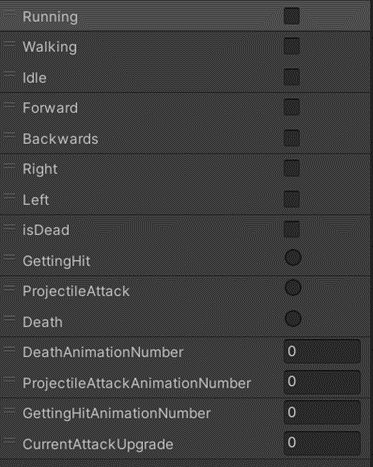
Unity Animator
AnimationController.cs (parent)

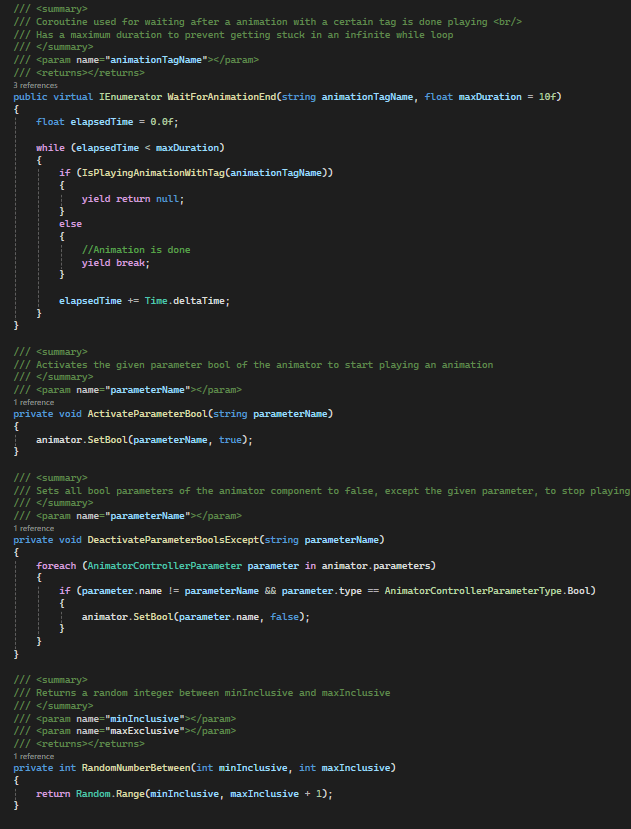
In the code, the word ‘tag’ is often found. This is because I labeled the animation with a custom tag. I did this because for some animations, they belong to the same category but are inherently different. I apply this for animations like getting hit, dying or attacking. Using a tag for these animations meant that I could check for a certain action instead of using to check for each single animation separately, which was a lot more convenient.
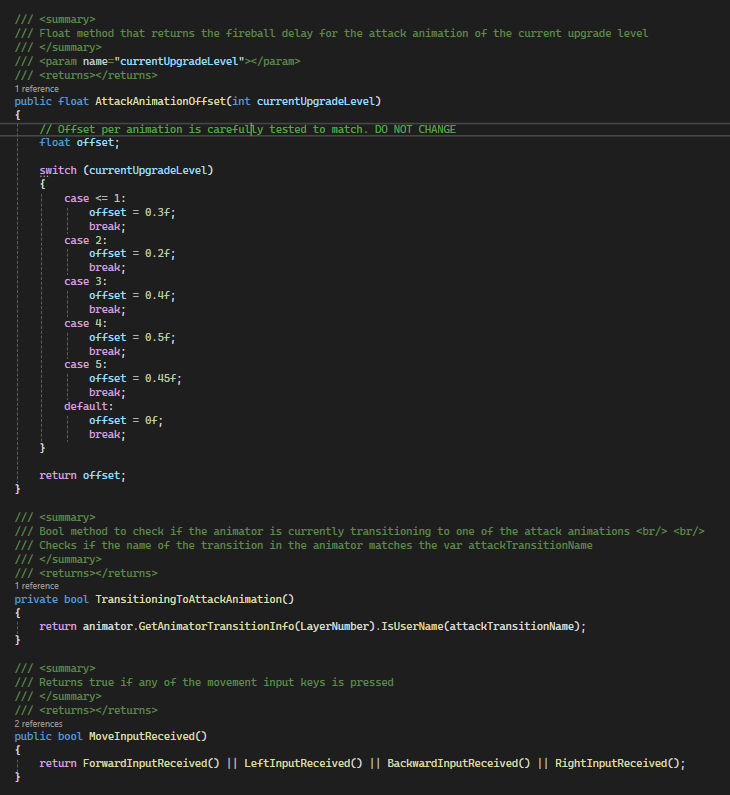
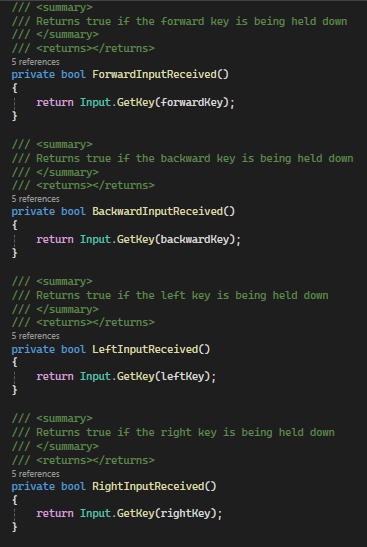
PlayerAnimationcontroller.cs
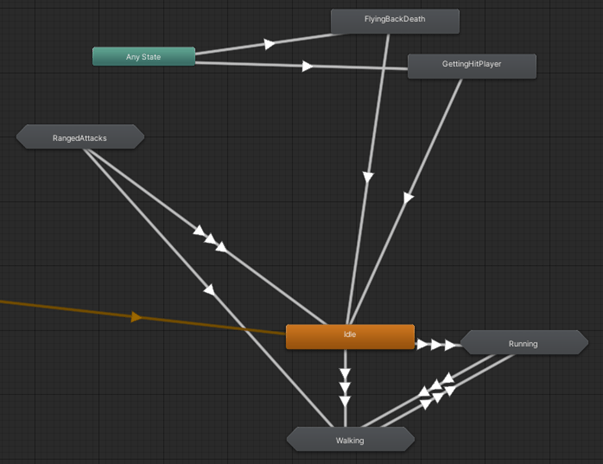
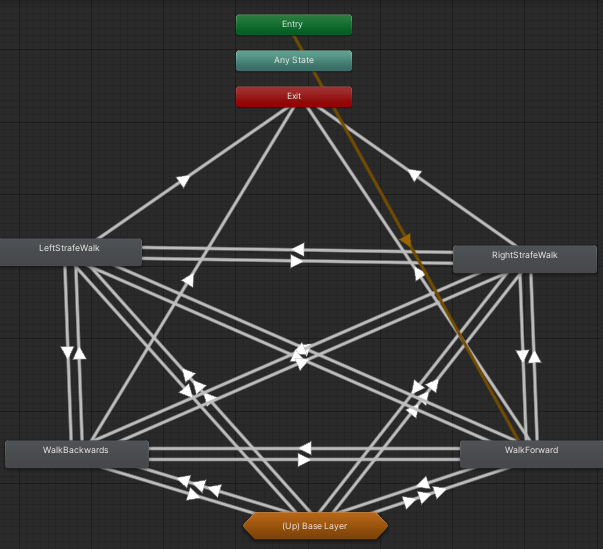
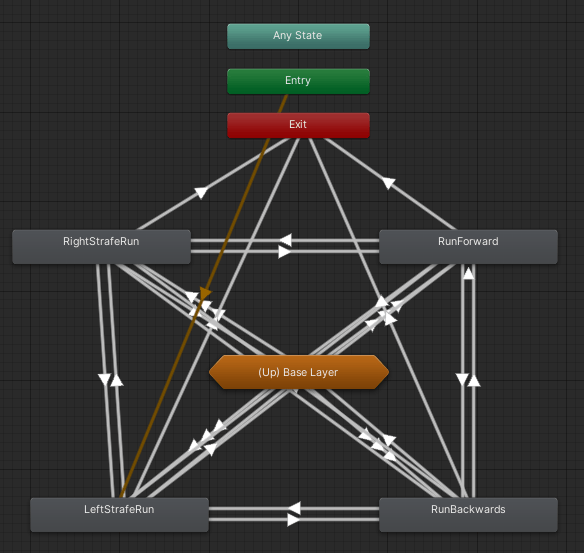
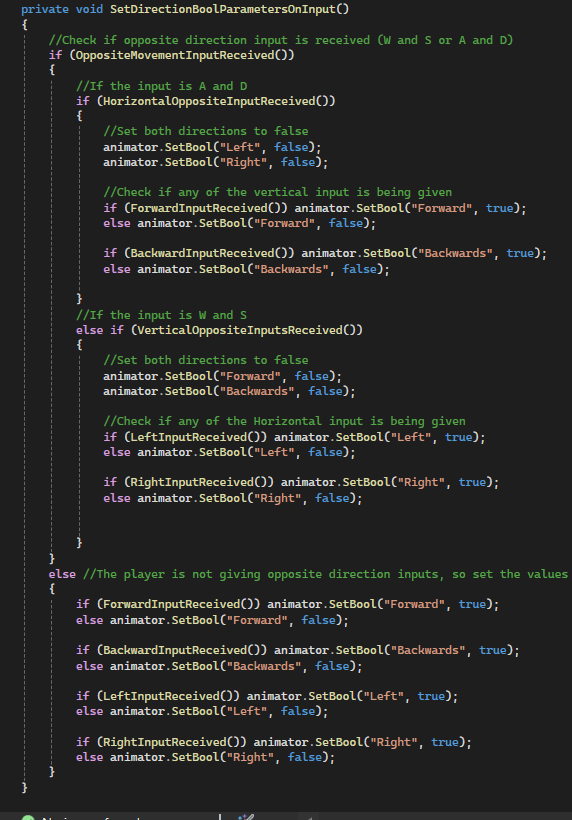
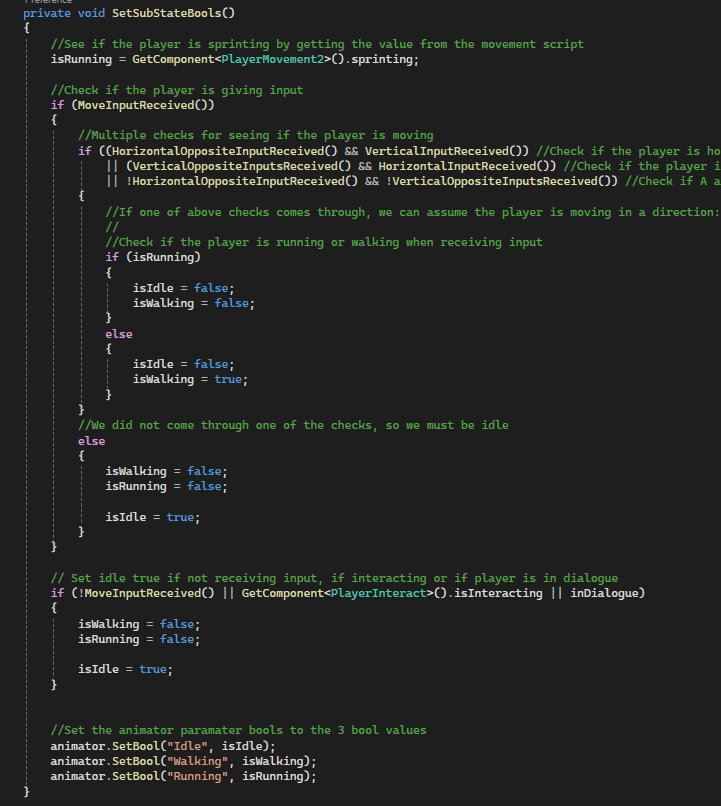
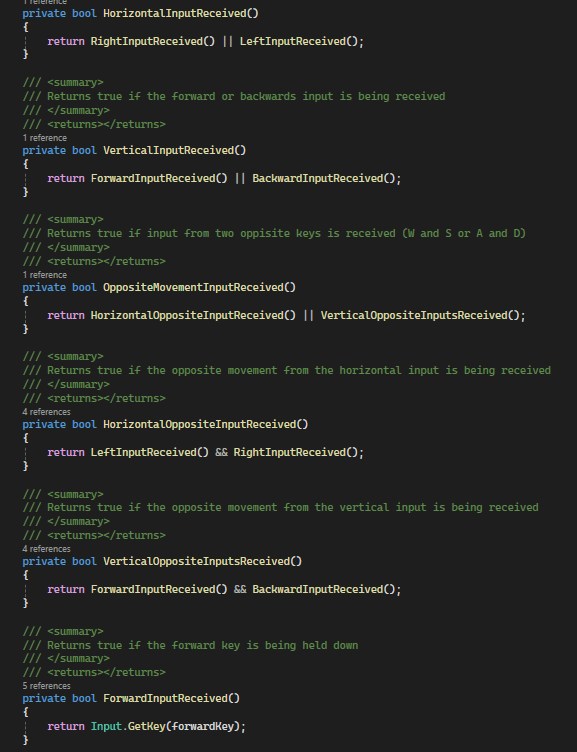
The player uses most of the functions from it’s parent class. Besides that, the player should also use animations for different types of movement and attacks. We needed animations for Idle, walking and running, as well as different attack animations based on the player’s current upgrade level. to achieve the movement animations, I create sub-state machines inside the Animator component for walking and running. Inside here, I add the four animations (for each direction) and make sure they can all transition to each other and the other movement animations. Now, the tricky part was to make all the transitions work well via code and scripts, since the parameters of the animator had to be updated to enable transitions between states. For this, I make a few functions to check what input the player is given and then set the parameters accordingly.
This is what the Walking and Running sub-state machines of the animator look like:
Example transition: From walking right to back

Example transition: from running left to walking left

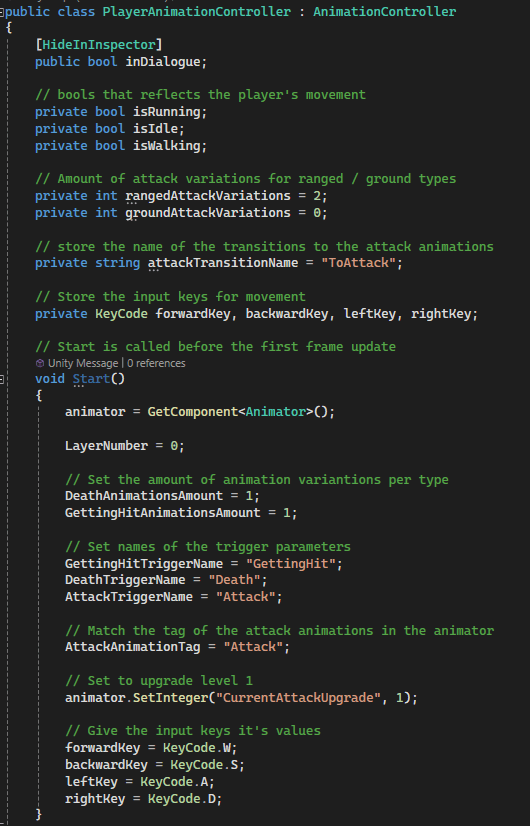
And this is how I implemented the AnimationController for the player:
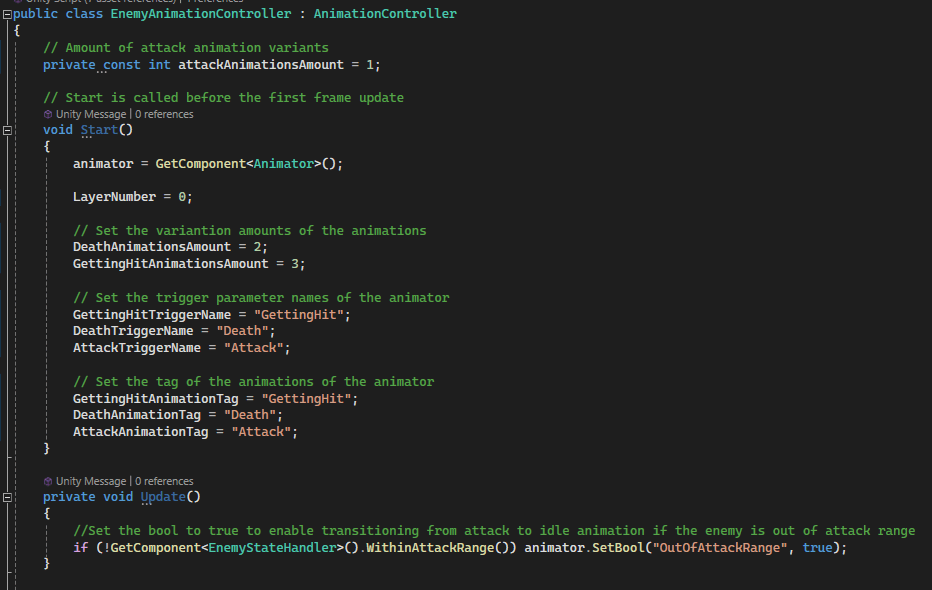
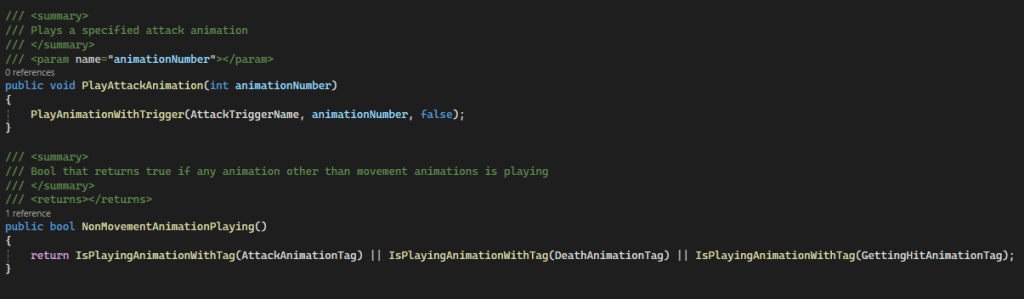
EnemyAnimationcontroller.cs
The last animation controller I made was for out basic enemy. This enemy only needed custom methods for playing an attack animation, as well as a method to check if the enemy is playing a animation outside the movement animation. Because of this, this class is much shorter and looks like the following:
Cameras
[More coming soon…]
