Context
For this project, students had to work with animations and state machines. In the project, called Megaman, the animations for the player character are missing. The goal for the students was to implement various animations and transitions to make the player character look and behave as expected. Furthermore, students had to implement a simple enemy that would jump towards the player if the player is near, otherwise patroll around the platform he’s on. The big catch of the project was that students were not allowed to use Unity’s Animator (apart from playing the animations). The states and transitions should fully be implemented in code.
My implementation consists of using and making a state design pattern. This means making a single parent class for a state, then making individual classes for every other state. Because the player character should play lots of different animations, this approach seemed to be the most fitting because the code is more understandable and consists of a clearer architecture.
In this post I will present my work regarding these ‘state’ classes. Starting of with the base class.
Project showcase
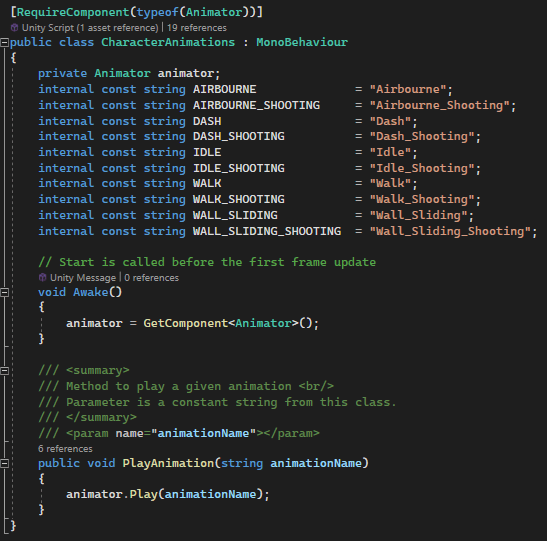
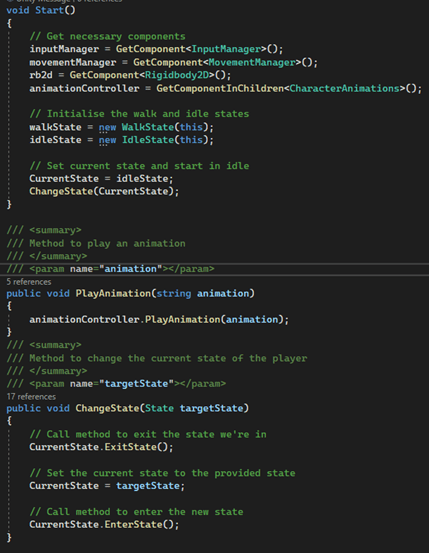
First, I present a very basic class that stores a reference to each individual animation and the Animator component. I will not be using the Animator to make transitions, but it is necessary to play each individual animation. In the animator component, I drag each individual animation and give them a name. Then, in the script seen below, I create constant variables that match the names of the animations. In this class, I only need a reference to the animator and a function to play animations from other scripts. This is what this class and the animator looks like:
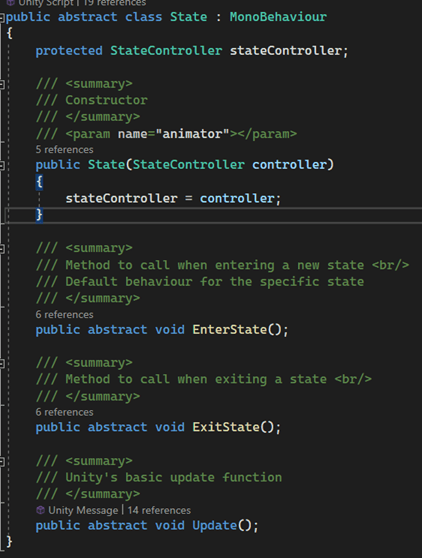
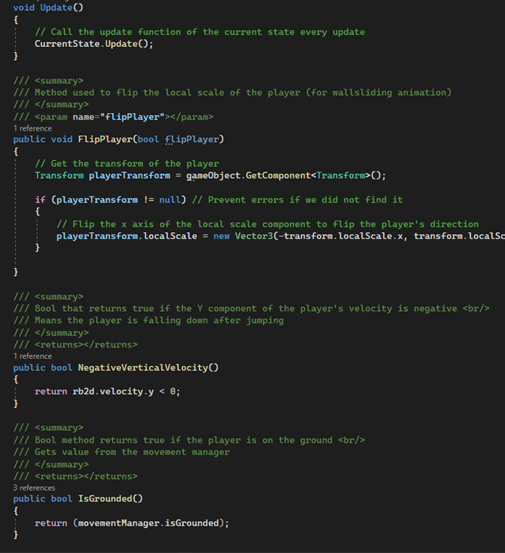
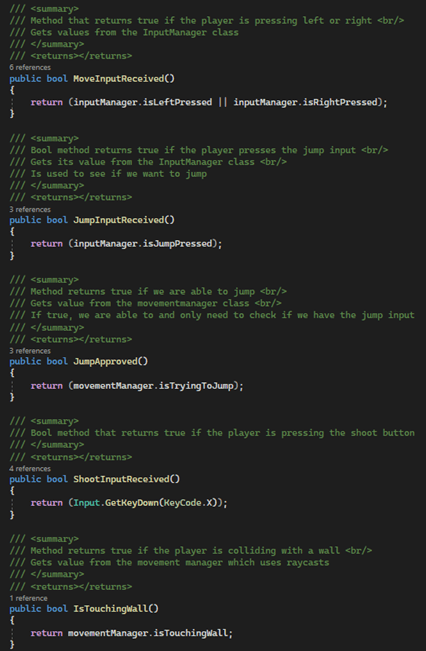
Next, the parent class for each individual state is an abstract class with a reference to another class, a StateController. This controller class will be used to switch between different states and consists of functions to help calculate certain logic and requirements (player is on the ground, in the air etc.). The parent ‘State’ class looks like this:
Now that I’ve shown these two classes, we can look further in the states and other classes. Let’s start with the StateController class.
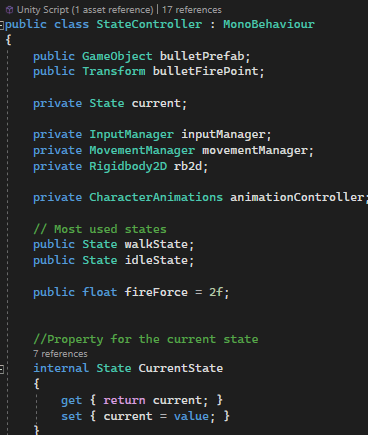
StateController.cs


Individual state classes
Now that I’ve shown the core class of the project, I’d like to show the individual classes for each state.
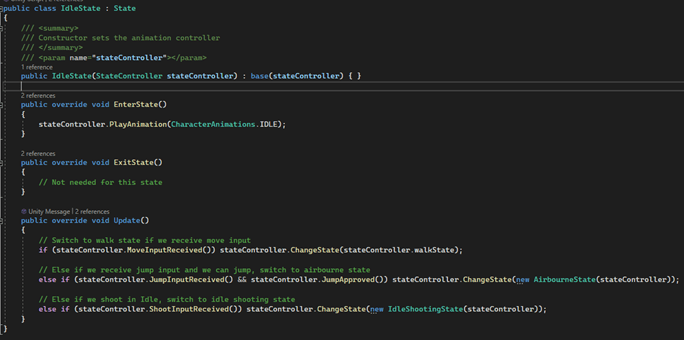
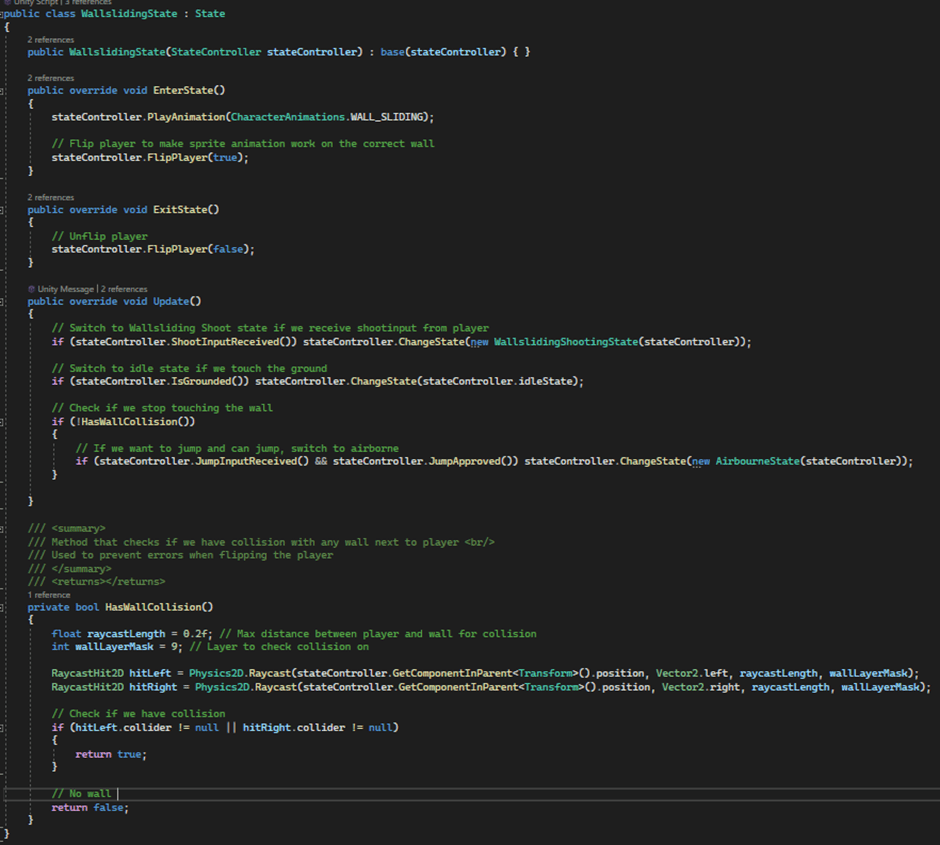
Each state derives from the ‘State’ class. Because this is an abstract class, each individual class has to implement the constructor and abstract classes provided in the ‘State’ parent class. I chose to implement an EnterState and ExitState method, this would be beneficial to keep transitions between states smooth. In the EnterState method, the animation for that state gets played and the player might get it’s sprite flipped depending on the state. The ExitState method gets called in fewer classes, mostly because there is no behavior necessary for these classes. This is what a few of the individual classes look like:
IdleState.cs
WalkState.cs

AirbourneState.cs

WallslidingState.cs
Shooting states
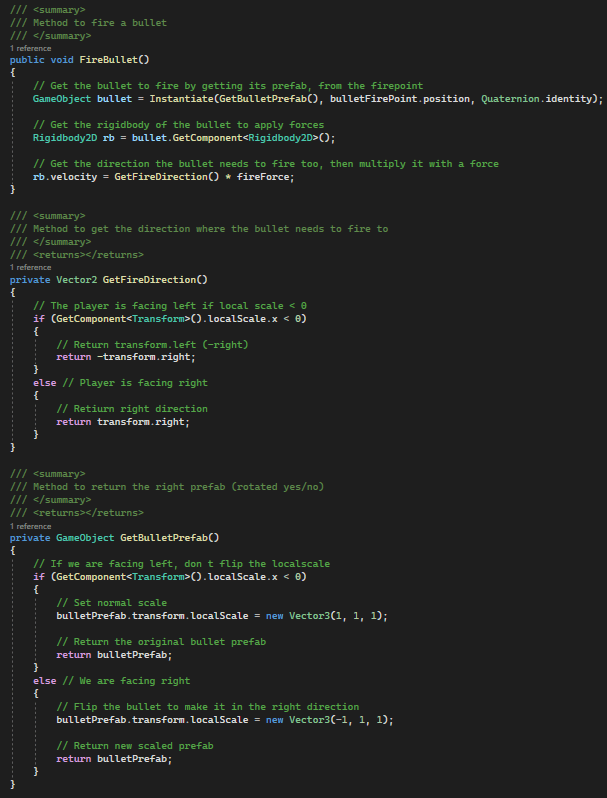
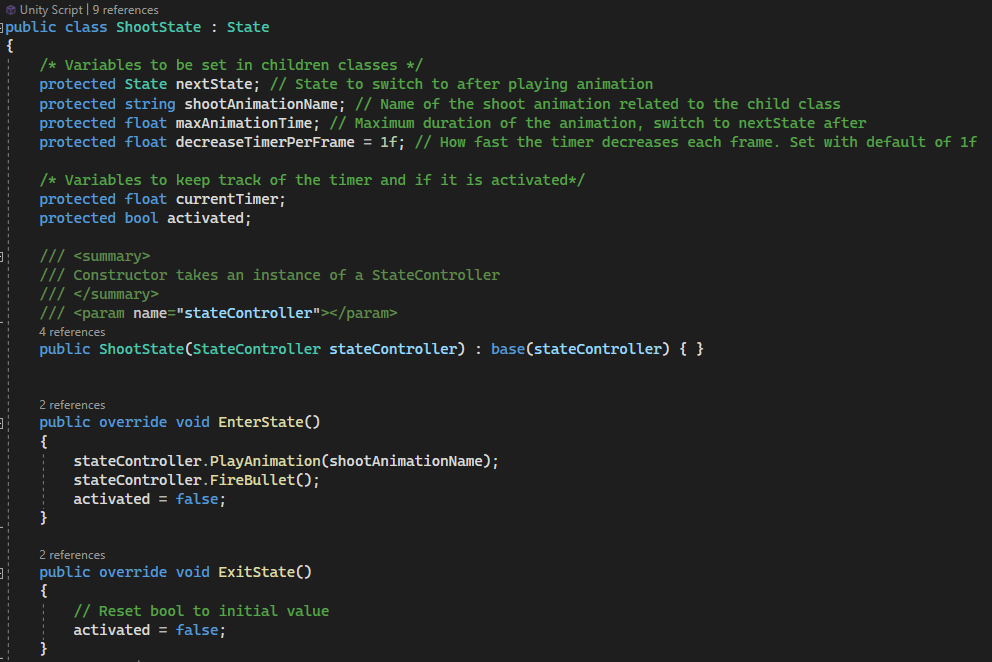
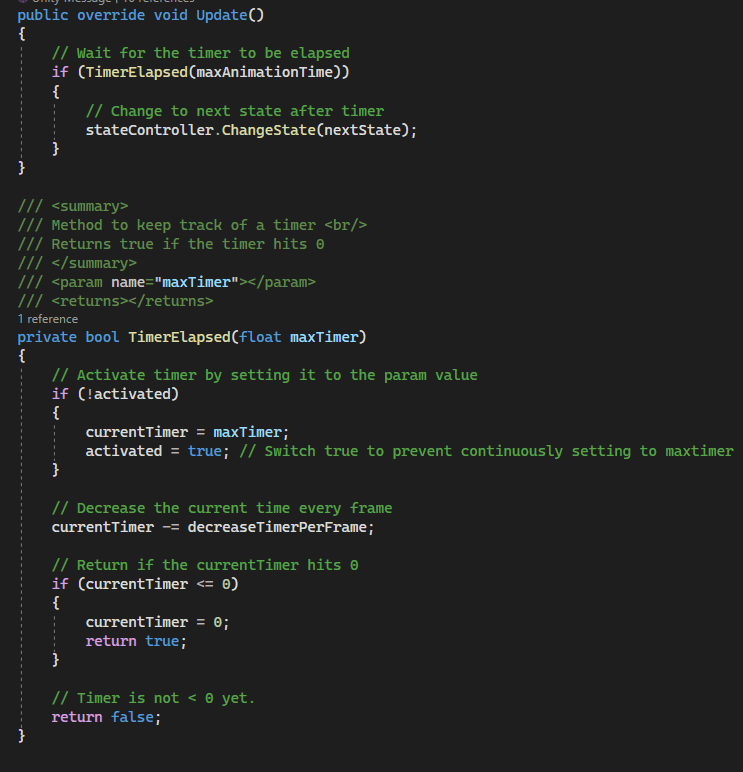
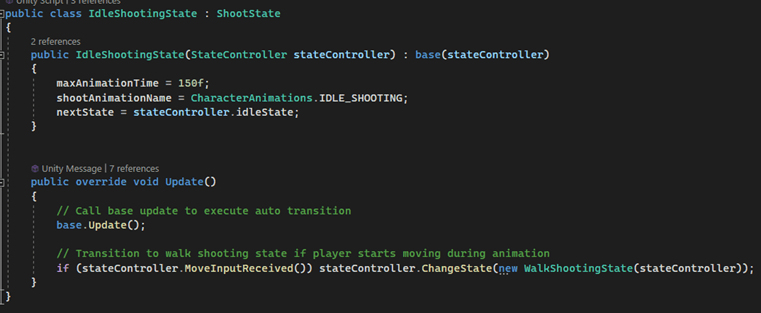
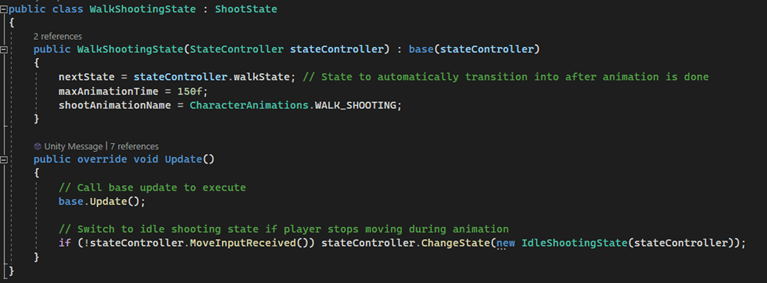
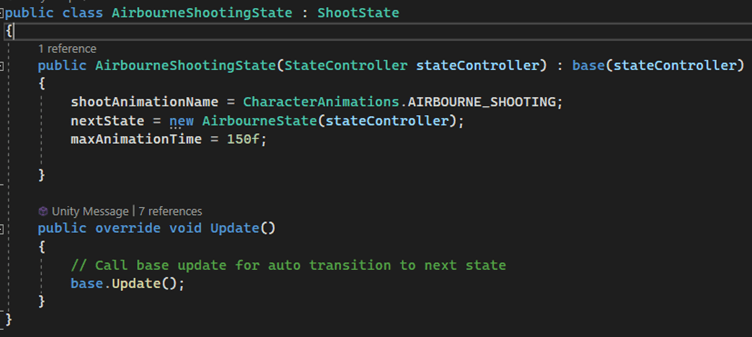
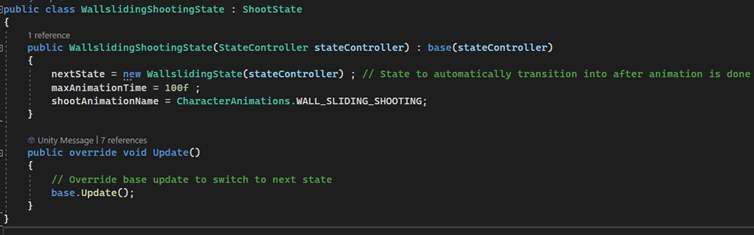
Above I showed the movement classes for each state. Now, while in one of those states, the player should be able to shoot bullets. When this happens, the state should switch to another state (one of the shoot states) depending on their current actions. Because the shoot animation is only happening when input is received, the animation has a short duration. To prevent having to write logic for every individual transition from a shoot class back to one of the movement classes, I make an automatic transition to a next state inside the shoot states themselves. To do this, I implement a parent class, called ShootState, that derives from the earlier seen ‘State’ class. In this new class, I declare a few variables and implement a method that will countdown a timer. When the timer is fully elapsed, the state transitions to the next state. Now, the next state is a variable that will be set in the individual shooting states, and will be the one which they are named after (IdleShootingState will transition to IdleState for example). This approach makes it way faster to implement all the shooting states, and proves to be more organized and efficient. Here’s what these classes all look like:
ShootState.cs (parent)
IdleShootingState.cs
WalkShootingState.cs
AirbourneShootingState.cs
WallslidingShootingState.cs
Apart from the states and transitions between states, I also worked on an enemy for this project. The enemy had to patrol around on a small platform, then jump towards the player if he is near. When reaching the end of the platform or when landing, the enemy should idle and turn around to walk the other direction. I’ll go a bit more in depth on the details below.
Enemies
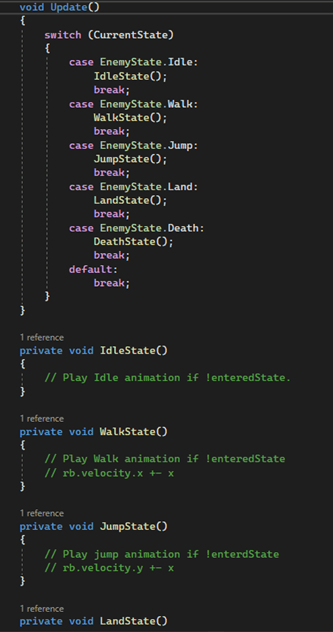
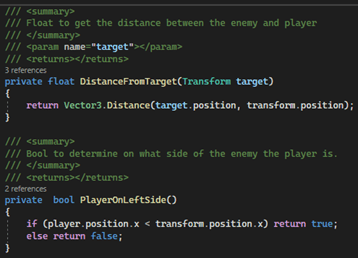
I chose to take a difference approach regarding the states and animations for the enemies. Instead of making individual classes for each state, I’ll use a switch statement for each state. Since the enemy only has 5 states, Idle, Walk, Jump, Land and Death, this seemed to be a valid approach. In previous projects, I have worked in a similar way, so I wanted to see how I’ve improved my skills since those times.
I will not be showing the whole code for the enemies, since this is too much and a lot of it is not that interesting. I will however show code snippets that I’d deem interesting and worthy, let’s get into it!
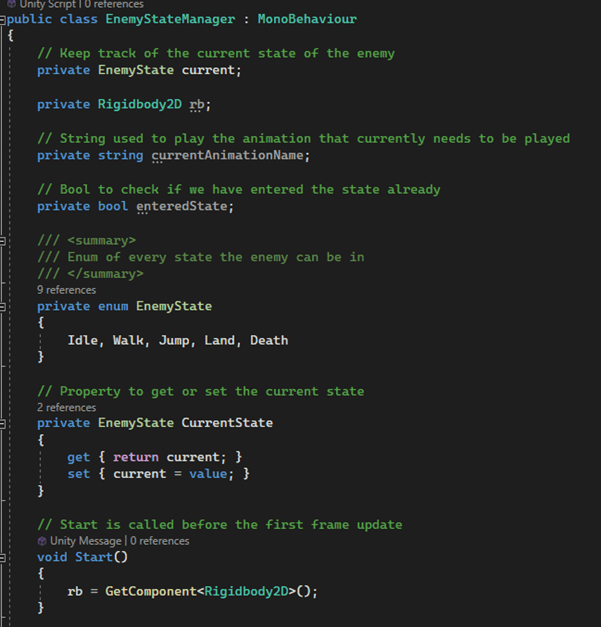
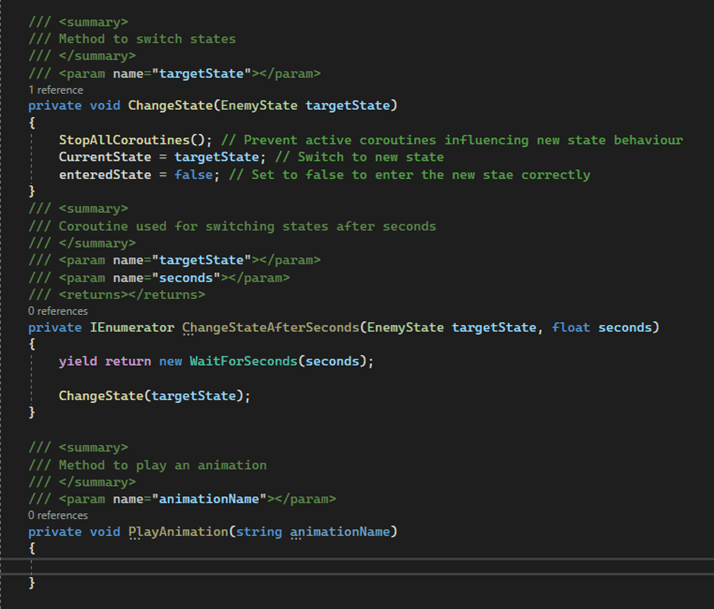
EnemyStateManager body
This was a setup for how I’d want to implement the enemies and their behavior, hence why the functions are empty:
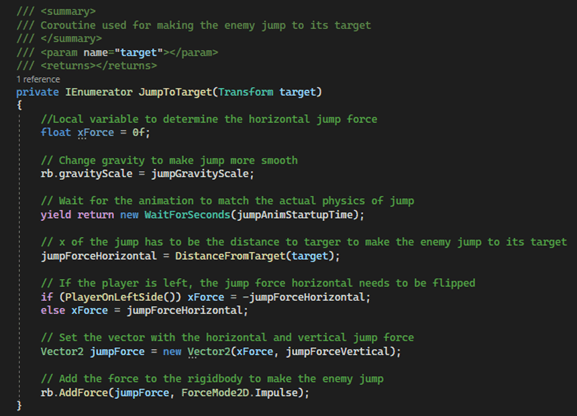
Jump Physics
This coroutine method makes the enemy jump towards a target. The method gets called inside the JumpState function, this will be shown after the physics. The coroutine looks like this:
States and transitions
Lastly, I will show the code for each individual state and the transitions to other states.
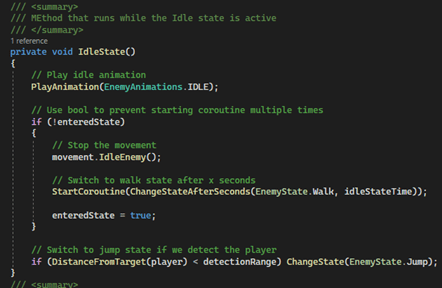
IdleState:
WalkState:

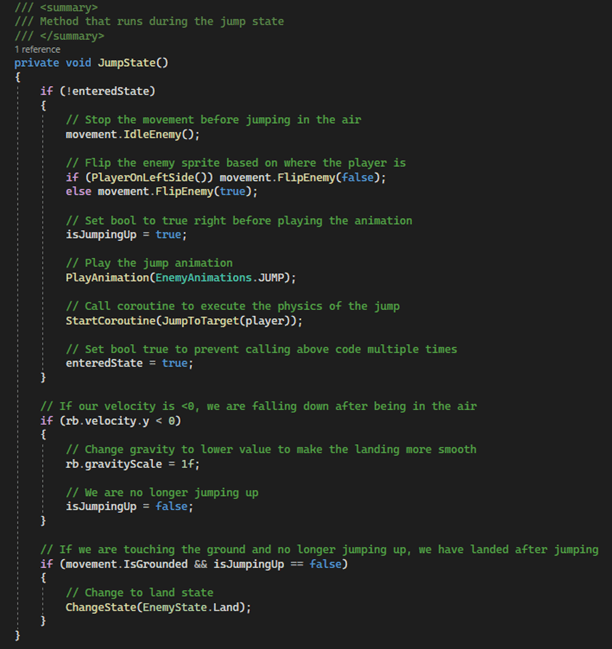
JumpState:
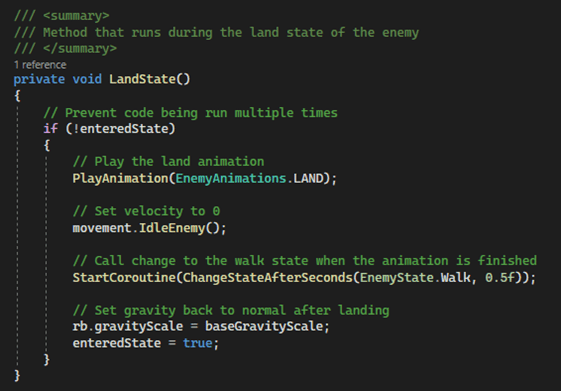
LandState:
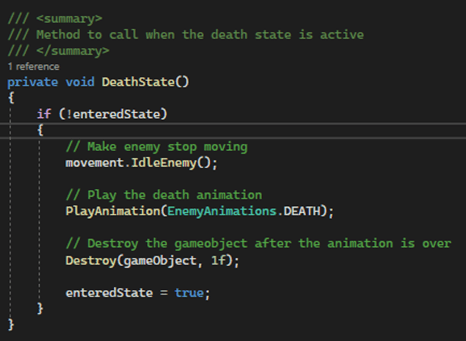
DeathState:
Conclusion
I hope this post provided enough insight for this project. While working on the project, I learned a lot about various topics. Although working with a state design pattern was completely new to me, working with animations and states themselves was not. In a previous project, I implemented an enemy with the use of a switch statement. At the time, I thought this was the most efficient and organized way to implement such an enemy, but this project proved I was completely wrong. Using a state design pattern proved to be way more efficient, organized and structured. I had a lot of fun figuring this principle out and trying to optimize it in the timeframe I had. Not only did I learn more about states and transitions, I also had a big refreshment about the topic regarding inheritance and the abstract keyword. This proved to be valuable for me, and with adding all the new knowledge about the state design pattern to my brain, I have to say that I’m excided to put this into my own projects and see what I can make with it from scratch. Thank you for reading!
